How to do this: Annotate a PDF document.
Perfect PDF® 12: New, modern design, Windows 11 compatible and more powerful than ever
Annotate PDFs
In Perfect PDF® 12
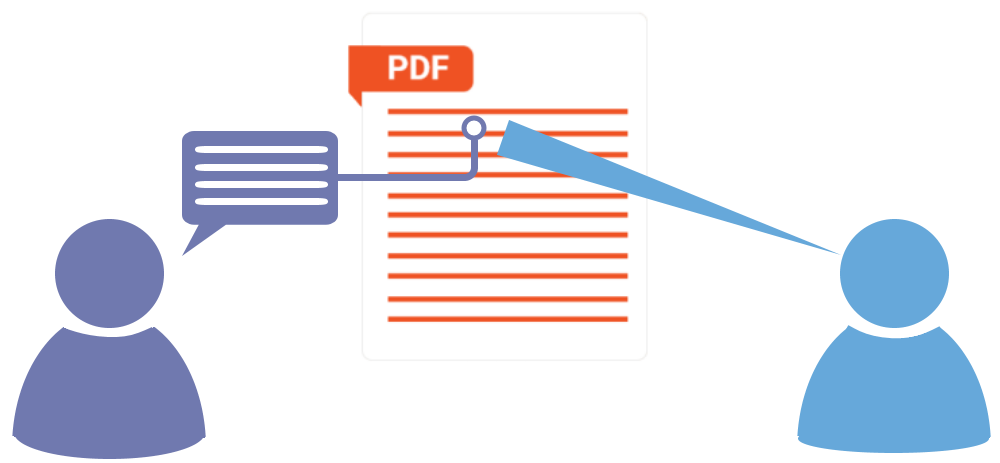
While looking through an important document, some questions came up or maybe one or the other paragraph should be worded differently? Annotations are often written in PDF documents in order to quickly communicate one’s thoughts on certain points to a person or group. Of course, you can also use the annotation function for yourself while reading a PDF document. Insert annotations quickly and easily: With Perfect PDF 12 there is a powerful and intuitive tool with which important information can be added to PDF documents in no time at all and this information can be highlighted visually. The annotation functionality is part of the Perfect PDF ® 12 Premium Edition and the Perfect PDF® 12 Business Edition. It can also be optionally purchased as single feature.
Read more about Perfect PDF 12
Read more about Perfect PDF 12
1 | Annotate PDFs Annotations are not part of the “normal” page content of a PDF document and can be hidden if needed (for example when printing the PDF file). Should something be changed on the page content, here is a tutorial on editing a PDF file. The document to be annotated should be open first. Under “Document”, “Comments” in the ribbon, the interface for the annotation functionality is opened. On the left side, all annotations (if available) can already be seen in a list. Under “Add” all usable annotations are listed. |  |
2 | Text annotationsThis tutorial describes how to use text annotations. Annotations such as stamps, redactions, shapes and watermarks are described in a seperate tutorial. To add a text annotation to the document, “Add” must be clicked. All types of available annotations will be listed there. | 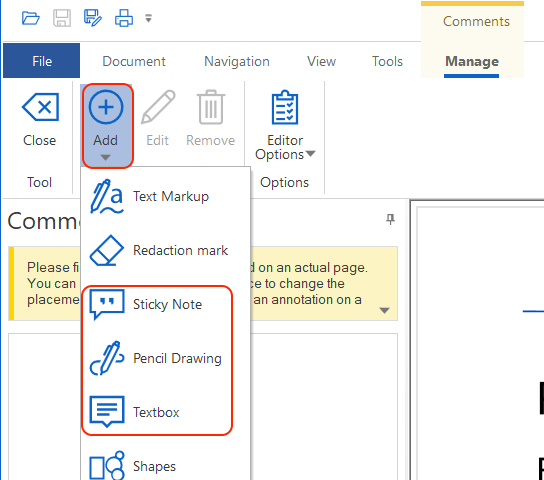 |
3 | Sticky NoteA note as annotation can have different forms of design. Once the note as annotation is selected, there is an option to select a shape. The choices are: ballon, key, sheet, question, different arrows and many more. Under the selection, a color can be defined for the annotation. | 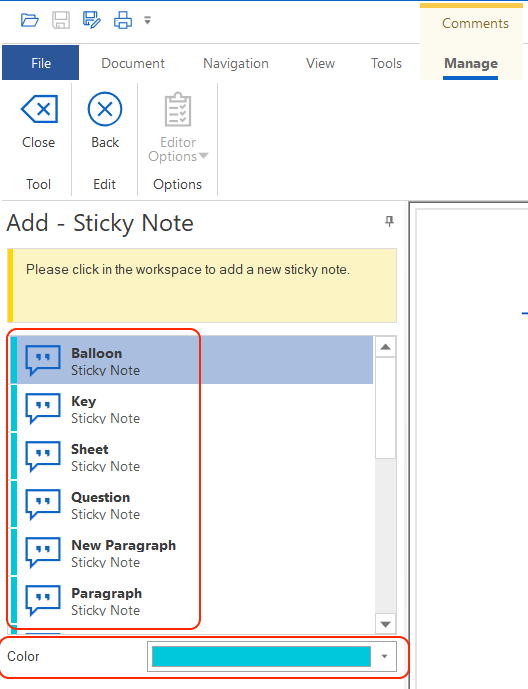 |
4 | Pencil drawingA pencil drawing can be inserted either with the mouse or with a suitable pen. To write a freehand annotation, “Pencil” must be selected under “Pencil drawing”, regardless of whether the mouse or a pen is used for input. After creating the annotation, a part of the pencil drawing can be deleted via the “Eraser” and the annotation can be moved via “Pointer”. The color of the freehand drawing can be determined via “Color”, unwanted incorrect drawing can be removed via the “Eraser” and the comment can be moved via “Pointer”. | 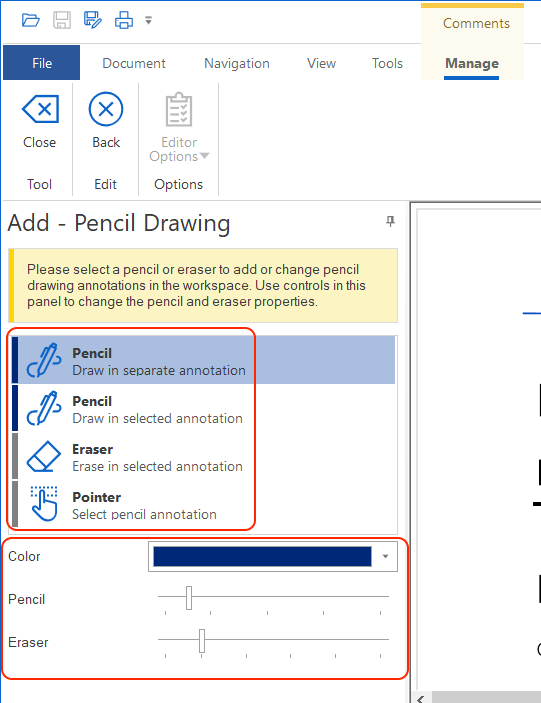 |
5 | TextboxThe text boxes can be displayed in two different ways. There is the “simple” text box, which can be drawn in one place and in which text can be entered directly. If there is little space in the document and such a text box could only be inserted in a few places, you can help yourself with the second type of display “Text box callout”. This type consists of a text box and a connecting line. The text box can be positioned at a free space and the connecting line can mark the place where something is to be annotated. | 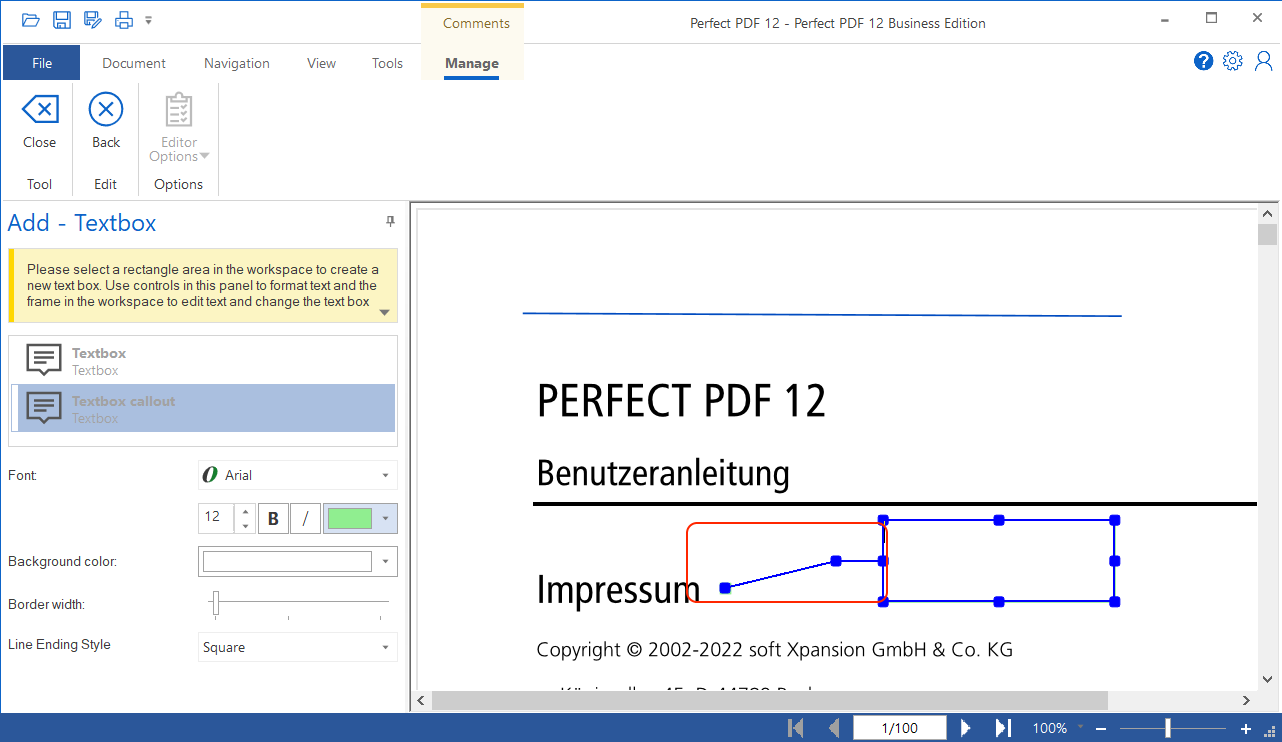 |
6 | PreferencesAfter creating the annotation, individual setting options can be made afterwards. The font, color, frame color, background color, thickness of the lines, as well as the line type can be specified individually depending on the annotation. | 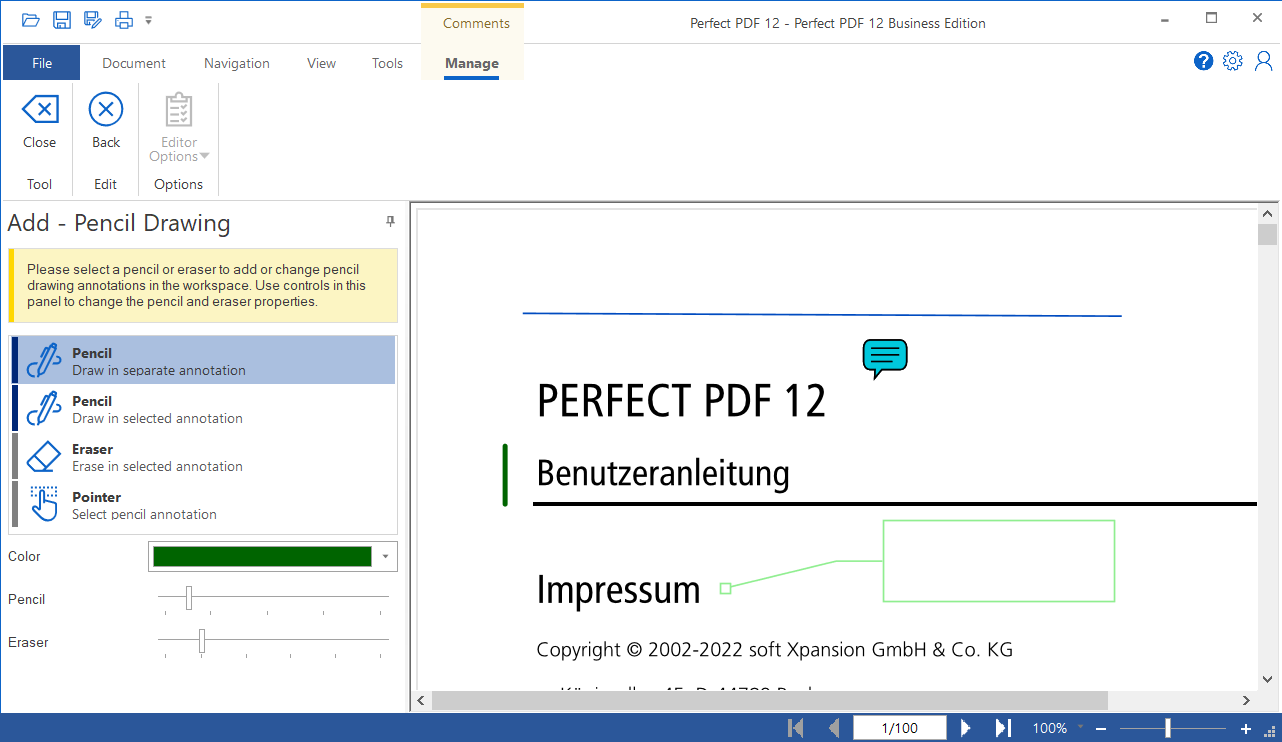 |
7 | Annotation overviewAs soon as all annotations have been created and settings have been made, if desired, the “Back” button takes you to the annotations overview. All annotations used in the document are listed there with the name of the creator and the time of the annotation. If you want to change something in the annotations later on, you have to click on the annotation and click on “Edit” in the ribbon. This process opens the same setting options as after creating the annotation. To exit the annotation tool, “Close” should be clicked. | 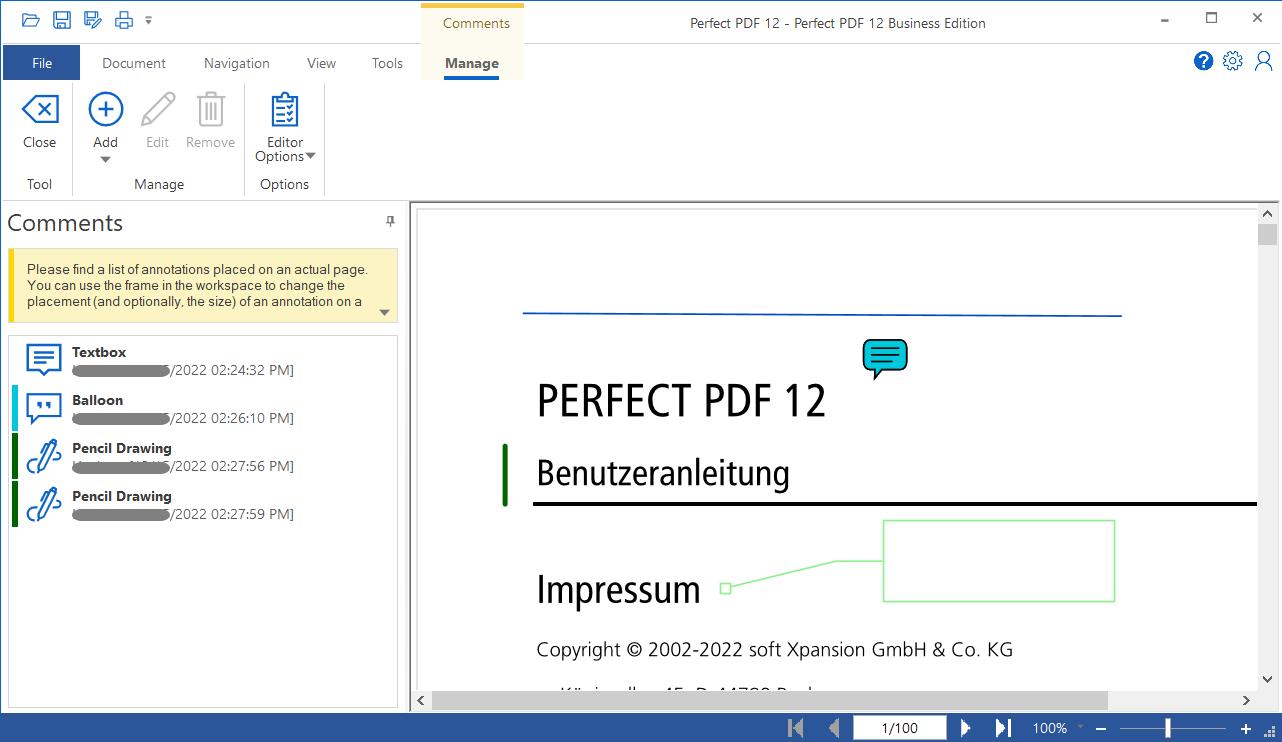 |
